Once again, the time of year has come around for everyone to get their visas for the summer (how is it May already?!) – I had my embassy appointment back at the start of April (I know, keen bean) and have my lovely new visa stuck in my passport, just sitting in my cupboard, waiting to head across the pond in only 18 days!
I’ve spent the past few weeks fielding a LOT of questions about embassy appointments and what you need to take with you on the day, so I thought I’d lay it all out for you here, in one simple post. So here goes:
- DS-160 confirmation page. This is the final page that you got when you completed your DS-160 form online. It has a photo of you on the left (if you were able to upload one) and barcode on the right. At the bottom, in bold, red letters, it says ‘THIS IS NOT A VISA’. If you haven’t yet completed your DS-160, you need to do that at least 24 hours before your appointment.

- Appointment confirmation. This will have been emailed to you from the embassy when you booked your appointment. It has 2 barcodes on it – make sure these are visible on the print-out as this is what they scan to confirm your appointment when you arrive. If you can’t find it it your emails (search for ‘donotreply@usvisa-info.com’), you can print it from your Embassy account (the website where you booked your appointment)
- Payment receipt. This will also have been emailed to you from the embassy when you paid the visa fee and booked the appointment. It just states your card number and that you paid for the visa. Again if you can’t find it in your emails, print it from your Embassy account.
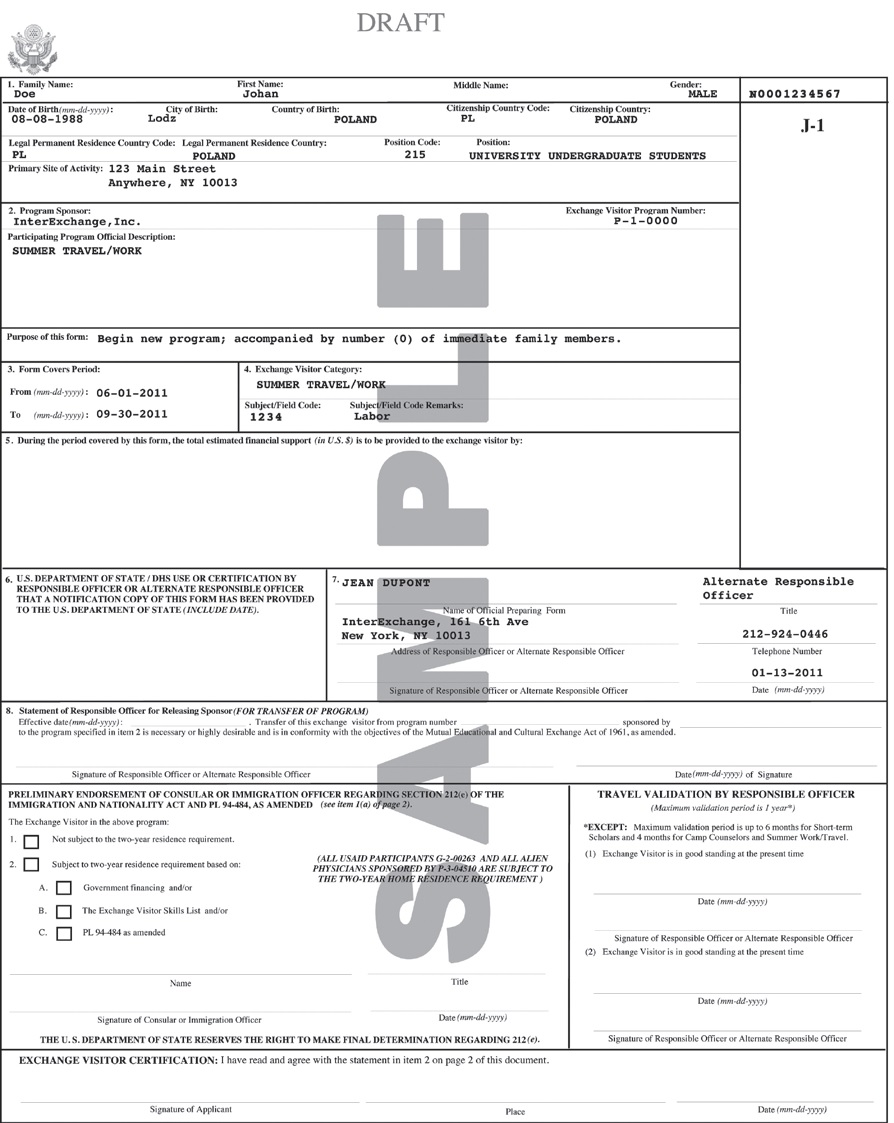
- DS-2019. This is VERY important. This is essentially the piece of paper that gets you your visa – it has all the details of your employment at camp, your start and end dates and your personal details. Your agency/sponsor will either post this to you or give it to you at the embassy on the day of your appointment. You need to sign at the bottom, write the location of the embassy you are going to where it asks for ‘Place’ (e.g. London or Belfast), and date it (in the American format i.e. mm/dd/yyyy).
- SEVIS/I-901. This is the payment receipt for your DS-2019 (I know, it’s confusing). Your agency/sponsor will either post this to you or give you instructions on how to print it.

- Passport. DON’T FORGET THIS. You’d be surprised at how many people turn up to the embassy without their passport! Check that it is within date and that it’s not damaged in any way – the US Embassy are very strict on damaged passports and may turn you away if your photo page is stained, ripped or creased.
- US Visa photos. These are NOT standard passport sized photos. They need to be square (2″ x 2″) and you can get them from most photo shops (e.g. SnappySnaps) or from the ‘Photo-Me’ booths you find in shops like Boots. Even if you mange to upload a photo to your DS-160, still take photos to your appointment too.
- Proof of intent to return. Sometimes they will ask for this and sometimes they won’t. Flights don’t really prove anything, as anyone can just miss a flight, right? You will need something that states you are going back to uni or have a job lined up. If neither of those things apply to you, just write a letter (a proper letter, with your address in the top right hand corner), that says something like this:
“To whom it may concern,
This letter is to confirm that after spending the summer at Camp ______, I will be returning to the above address, living with ___________ and looking for work in ________.
Yours sincerely,
___________”
And that’s it. Simple really. As long as you have those 8 things, you’ll be absolutely fine, and should sail on through the appointment. They’ll usually tell you on the spot whether it’s been approved or not (if they don’t tell you it hasn’t/give you a letter of rejection, then you’re fine and your visa has been approved), and then you’ll get an email within about a week to say your passport has been dispatched from the embassy and when it will be delivered/ready to be picked up from your chosen courier location.
As always, don’t hesitate to get in touch if you have any questions, or just simply leave them in the comments below.

Hi! Thank you for sharing! this is very helpful to me. I’m going to have my j1 interview tomorrow and wish to have a positive result.
LikeLike